I have had the opportunity to take my new Celestron scope out a couple of times since my last blog. Once out to my local dark site and another last night in my back yard. The focus of both of these outings was to assess the optics of the scope.
The first task was to determine how well the scope was collminated. This hast to be done before assessing the quality of the optics. This is pretty easy as you just find a bright star and focus on it. You then adjust the focus inside and then outside and see how the shape of the star changes. It should grow from a point into a perfect circle on both sides of the focus. If the shape is more elliptical and shifts on either side of focus then the scope is not collminated. I pleased to report that Calvin, as my daughter named the scope, is very well collminated.
Assessing the quality of the optics is done by performing a "Star Test." I am the first to admit that I am not an expert at this technique, but it is pretty simple to perform. Here is a link to a pretty good description of how to perform this test.
Basically all you do is de-focus a star using a fairly high power lens, say 100-200x, until you can see the diffraction rings appear. You make a mental picture of the rings and then de-focus the star on the other side of the focus. Ideally the ring pattern should be identical. The rings should all be perfect circles and well defined. The brightest rings should appear at the same spot in both the inside and outside of the focus tests. The star test for Calvin went extremely well. There were no signs of any astigmatisms or spherical aberrations.
I spent the remainder of the evening out at the dark site ripping off objects on my H400 list. I was able to log about 30 objects in the two hours I was out there. Here are some highlights:
Arp 135 - mag 9.6 galaxy in Perseus. At 163x the galaxy appeares oriented in E-W direction, core appears non-stellar
Arp 225- mag 11.0 galaxy in Cam. At 127x it is a very faint smudge, no structure visible. Too low in the northern sky to make out anything to note.
NGC 40 - mag 10.7 planetary nebula in Cep. At 127x the central star appears to be visible. It really tends to pop out more with averted vision.
NGC 1342 - mag 7.2 open cluster in Per. At 127x there are about a dozen brighter stars, 2 dozen fainter ones, not well concentrated.
NGC 1502 - mag 4.1 open cluster in Cam. At 127x the OC is dominated by a binary in center, it looks like two eyes staring back, 30 fainter stars, loose concentration.
NCG 6803 - mag 9.7 open cluster in Cyg. At 127x the OC forms a cross with 5 brighter stars in a line with fainter stars crossing at a right angle. Almost looks like a miniature Cygnus.
NGC 6885 - mag 5.7 open cluster in Vul. At 78x the OC is dominated by 1 britght star surrounded by 30 fainter stars. Slight mottled look on one side.
NGC 6910 - mag 7.3 open cluster close to the heart of Cygnus. At 127x the OC is dominated by 2 brighter stars, one of which is a nice gold color, about 10 fainter stars strung between the two brighter stars. Fairly well concentrated.
Well, the next blog will be after the new year and I will be taking an assessment of my observing activities of 2011, until then,
Clear skies,
rw
Friday, December 30, 2011
Friday, December 23, 2011
Celestron CPC800 - First Light - Part 1
Last week I wrote about why I chose the Celestron CC800 for my new scope. This week I want to share the first light experience.
The scope arrived via FedEx last Thursday. I worked from home that day so I would be present to accept the rather large boxes and avoid them being abandoned on my front porch. The scope came in two boxes with the Power tank arriving in a third. All appeared in order upon an initial inspection of the condition of the boxes. Celestron used double boxes to ship these scopes in. I am not sure if they have always done this but it sure does make a very secure shipping package.
The set up was quick and easy. I had pre-read the instructions available for download on the Celestron website. The instructions were simple and very clear. The one thing I discovered while setting it up was that it is important that the clutch on the azimuth axes needs to be snugged up a bit when placing the scope on the tripod. This is necessary so that the scope base will turn as the top is rotated to engage with the self locating mechanism.
I was lucky in that the skies Thursday night cooperated and I was able to observe some. For this first light experience I chose not to go to the dark site but to just set it up in my back yard. I did this as I thought if there were issues and I needed some light to help I could always turn on the flood lights. Fortunately this was not necessary.
This first session was really just an opportunity to see how the alignment process worked and not really an observing session. There are several options to chose from in the alignment process. I chose the "Sky Align" method in which you center three bright stars or planets in the eyepiece. The scope's internal computer determines the identities of the objects and calculates its alignment parameters. This takes all of about 5 minutes to do. Once this was performed, I chose an object, Jupiter, and let the scope slew to it and just like magic, Jupiter appeared in the 40 mm eyepiece. Alignment success!
I spent the next hour just getting the hang of the hand controller and slewed to several brighter objects, i.e. M31, M103, and a couple double stars. The observing conditions in the back yard were really not that favorable to determining the optical quality of the scope and so I would just have to be satisfied with check out of the mechanics. I did test the collmination at one point on a star and I was presently surprised that the scope was still in collmination after being transported and handled.
Well after about an hour I noticed that the corrector plate was starting to dew over quite significantly. So I decided that I would call it a night. The dew shield I ordered has not yet shipped but I am expecting it within another week or so. Until then, dew is going to be problematic for this scope.
Next week I will tell y'all about the scope's first trip to the dark site I use and how the optics checked out. Until then, Merry Christmas and clear skies.
rw
Saturday, December 17, 2011
A New addition to the Family
This week saw a new addition to my family, ......my telescope family that is. After long deliberations and an approval from the family CFO, I placed an order for a Celestron CPC800.
I say, long deliberations because the decision to purchase a new observational instrument is never an easy one for me. For those that know me, they know that I do not like parting with my green backs very easily, and a scope like this requires more than a few green backs. By far this is the most that I have ever laid out for my "hobby."
So how did I arrive at the CPC800 you ask? Well, it has been a long journey, let me tell you about it. As you may know, my main observing instrument for the past year has been a 10" f4.9 reflector on a Dobson mount. This was a step up from my 8" dob reflector that I had used for many years. The increase in aperture was fantastic and really allowed me to go deeper than I had ever done with the 8". However, along with the extra aperture comes additional weight. I hate to admit it, but the weight issue starts to become more important as one ages and especially when you have to transport and set up the scope at remote sites. My back just ain't as good as it once was, even then it wasn't that great.
The solid tube reflector tube had a weight of about 40 lbs. Anything more than this is really pushing it, especially when handing a precision instrument. It ain't no bag of cement, you know! So weight and portability were high on the list.
The second consideration was the GOTO capability. Now for a long time I have been a strong advocate of star hopping. You know, using a star chart to "hop" your way from one object to another. Well, ever since fitting my 10" dob with manual degree circles and utilizing a real time planetarium program, I have felt the ever-increasing pull towards the GOTO revolution. I say revolution, but in reality, these computerized GOTO scopes have been available since the 80's, I am just a wee bit behind the times I guess.
GOTO does two things, first it allows the location of faint objects to be like falling off a log once the scope has been properly aligned. Secondly, it keeps the object in the field of view, allowing the possibility of astro-photography at some point down the road.
So, the criteria was a GOTO scope who's components individually weighed not much more than 40 lbs. There were a few candidates, but I settled on the Celestron CPC800. The 8" aperture was driven by the weight consideration as the next size up, the 9.25" weighed in at 64 lbs! The 8 inch was 42 lbs which I thought I could live with.
Reviews of the CPC family on Cloudy Nights forums were generally positive. This is a scope that has been around for a while and Celestron has hopefully had adequate time to work out any bugs in the mechanics and software that drives the scope. I am not one of those that goes out buys the latest and greatest of anything. I prefer to go to school on other's experiences.
The deal closer on the Celestron was finally the sale that the company was running. It was not a huge sale, but it was enough to make me pull the trigger sooner rather than later.
So, there you have it, my reasoning for the new family addition. The subject of my next blog will be the first light impressions of the new family member, until then...clear skies.
rw
Sunday, November 6, 2011
ESP- Part 2
It has been a week since I have been back from the Eldorado Star Party and the rigors of the job and the demands of the family have tried to crowd out the memories of that week under the skies of West Texas.
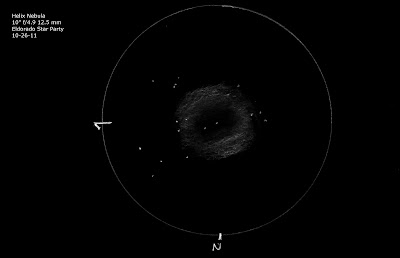
One of the ways to combat this is to review and process my sketches from the week. The word "process" is a little misleading. The technique that I have developed for digitizing my sketches is rather simple. First, I scan the sketch using my Canon MP240 printer/scanner and save it to a .jpg file. I then open the file using a freeware program, GIMP. Gimp is a a nice little program that has many of the features of the pricier programs like Photoshop. Using Gimp, I crop and then invert the image to make it a white on black image. I then zoom in on each star and using the paint brush make sure the stars are rounded. Once this is done, I adjust the brightness and contrast of the image to ensure that the detail comes out. Lastly, I add text to the image.
Below are some of my sketches from the star party. You can double click on the image to enlarge it.
NGC 7331 is a fine edge on galaxy in Pegasus. It was discovered by William Herschel in 1784. It is relatively bright at 10.2 mag. It is also relative close to Stephen's Quintet and can be used as a way-point when star hopping to the galaxy group. NGC7331 is also the center member of a grouping of galaxies called the "Deer Lick" I was unaware of this at the time of the sketch and so I did not look for them. Another reminder to research your objects be fore you observe them!
Comet Garradd is bright comet that has been taking a leisurely tour of our solar system. Th comet is currently in Hercules and is well placed for observing in the early evening. It appears a fuzzy ball through the eyepiece with just a very faint tail trailing off to the west.
The Helix Nebula, NGC 7293, is one of the brightest and largest planetary nebula in the northern sky. We find it in Aquarius at 6.3 magnitude and nearly 16 arc minutes in diameter. There have been some incredible color images taken of this object. Look it up on your browser and you will be amazed at the beauty of this object.
Also in Aquarius is the 6.2 mag globular cluster M2. This is a relatively compact globular with a mottled looking core. Individual stars are visible across its diameter.
NGC288 is another globular, this time in Sculptor. It is less concentrated than M2 and appeared to me as having a larger diameter. It is bright at mag 8.2 and is only about 1 degree away from the bright galaxy NGC 253.
Clear skies;
rw
Sunday, October 30, 2011
Pushing the limits at ESP'11
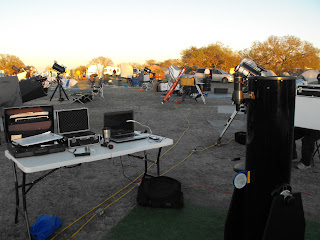
This past week I attended the Eldorado Star Party, held at the X-Bar Ranch near Eldorado Texas. This is an annual star party hosted by the Austin and San Antonio astronomy clubs. This is my second time attending this event and it is quickly becoming one of my favorite star parties.
There are two real positives that this star party has. First, and foremost, the weather is almost always very good. I was able to observe four of the five nights I was there and with near perfect seeing and transparency. Second, the skies are really dark. There is a small light dome from Sonora in the south and Eldorado in the North-East, but neither is more than 20 degrees above the horizon. So dark skies and great weather make a perfect combination for a star party.
The party was well attended this year. I arrived on Monday and found a spot on the West side of the field. I set up beside some folks from the Central Texas Astronomical Society. These folks proved to be real friendly and I enjoyed their company throughout the week.
By Friday, I estimated that there were 175 people on the field. While the field seemed "full" it was not overly crowded.
Monday through Wednesday proved to be pretty good skies allowing me to log in excess of 20 objects a night, peaking at 26 objects on Wednesday night. Clouds finally rolled in after midnight on Thursday morning and with the clouds came a cold front. Temperatures went from the 70's to the 40's and cold weather gear was the order for the day. Thursday was spent at the Ranch House avoiding the cold and catching up on my observation logs. Thursday night looked to be a washout and so I joined the others at the Ranch house to watch the Rangers give away the World Series to the Cardinals in Game Six. Friday night proved to be the best of the lot, The cold front had moved out any moisture in the air and the skies were clear and crisp. I logged another twenty plus objects on my Herschel 400 list. This was my last night at the party. By 10AM Saturday morning I was packed up and heading East down I-10 towards home.
So, why the title "Pushing the Limits?" Well, this year's observation list was entitled, "Peeling the Onion." The idea was that there was a list of lesser well known objects within close proximity to a very well known object. For example, M31, the Andromeda Galaxy was on the list as well as its companion galaxies M32 and M110. Easy right? Anyone that has a half-way reasonable telescope has seen these. Well how about NGC 206 or some of M31's globular clusters? Not so easy now. Some of these objects are listed at magnitude 14. Until now, I had never even attempted something that faint. This was going to "push the limits" of my scope.
Last year at ESP'10, my Zhumell 10" was brand spanking new and I was content with seeing how it performed on some easy-to-find galaxies. While the dark skies of this year's Texas Star Party would have provided an excellent opportunity to "go deep" and see what the scope could really do, the weather did not cooperate. So, this week I had the weather and the dark skies in my favor. If the 10" water heater was going to prove its worth, it was going to be this week. It did not disappoint me. Armed with a good star map, courtesy of Sky Tools, I went in search of M31's globulars. Boy these guys are faint, but I did see them with averted vision. Equally as tough was some of the star clouds in the Pinwheel galaxy. I got so carried away with looking for these guys that I ended up observing two or three additional ones that were not even on the list!
So, I muddled my way through the list and achieve my pin before the clouds rolled in on the Wednesday night. Objective 1 out of the way, but there was still the H400 list that I was working on and a series of Galaxy Clusters that I wanted to observe as this is one of the few sites dark enough that I would have a chance at.
One of the clusters that I have been wanting to observe is a chain of five galaxies in Pegasus that are known as Stephen's Quintet. I notice as I was observing NGC 7331 off of my H400 list, according to my star chart, Stephen's Quintet was about a degree to the North-East of this galaxy. So, I gave it a try. The first thing you notice when you spot these guys are their stellar-like cores. As you stare into the eyepiece and concentrate more, slowly the ghost-like halos start to emerge. They are still very faint, but noticeable. The two galaxies in the center NGC 7318A and 7318B are so close together that they appear as one single object. The fainest of the five is NGC 7317 which comes in at 14.6 magnitude!
By far, Stephen's Quintet was the best site of the week. The 10" Zhumell, "Zoe" has once again impressed me. Aperture rules!
Clear skies
rw
Saturday, September 17, 2011
Globular Clusters
This week I've decided to share some thoughts and observations on globular clusters. For those non-astronomy folks that might be following this blog, globular clusters, or "globs," are a group of stars that are bound tightly by gravity into a ball or "globe" like structure. They are generally more dense at the center with the density falling off as you move away from the core.
The spectral analysis of the stars of globular clusters show very little evidence of metals. What this means is that the stars are extremely old. The origins of these clusters is not well understood. What is known is that most galaxies do seem to have these structures in their halo regions. Our Milky Way galaxy is home to about 150 globs. Large galaxies at the center of galaxy clusters can have many thousands of these globs. It is probable that these clusters are artifacts from interactions between a large galaxy and dwarf galaxies where the larger galaxy strips away the outer stars from the dwarf galaxy leaving only the core to be locked in orbit around the larger galaxy. Evidence that supports this theory has been found in the form of super-massive black holes that live in the center of these globs. This seems to indicate that these structures were once galactic in nature.
Globs make a good targets for urban observers as the are generally pretty bright. The majority of globs have apparent magnitudes less than 9. Globs are classified by the compactness of their structure. The Shapely scale rates globs on a scale of I to XII with I being the most concentrated and XII being very loose. Things to note while observing globs are, a) degree of compactness, b) color and brightness differences of the stars, c) resolution of stars in the central region, and d) the presence of dark lines or trails of stars.
Below are some images of globs that I have observed over the last year or so. The images are all from the Sloan DSS survey. They are all 60X60 arc minutes which makes them appear 50X bigger than they are to the naked eye.
M4 - Scorpio |
Discovered in 1746 by Cheseaux, M4 is a magnitude 5.8 globular in Scorpio. It is about 6,500 lights years distant from us, making it one of the closest globulars to us. It is relatively easy to find, being within 1.5 degrees of Antares. It is somewhat loose compared to some of the other globs. It is a Class IX on the Shapely scale.
Aug 21, 2011 - Backyard
Zhumell 10" f/4.9
Aug 21, 2011 - Backyard
Zhumell 10" f/4.9
Smart Astronomy 12.5mm, 100x
Nice loose globular, stars resolved down into the core, streamers of stars trail off to the south of the cluster.
M5 - Serpens Caput |
M13-Hercules |
M5 is a Class 5 globular in Serpens Caput. It spans 165 light years in diameter and as such is one of the largest globs in our galaxy. It is 24,500 light years away.
May 10, 2010 - Texas Star Party
Orion 8" f/4.9
Smart Astronomy EF 16, 62x
Very nice globular. Stars resolved clearly, central regions are mottled.
M13 is one of the most beautiful globs in the sky. It is one of two globs which Messier cataloged in Hercules, the other being M92. It is about 21,000 light years distant, which is relatively close. It is above average in both brightness and luminosity. It is a Class 5 on the Shapely scale.
M71-Sagitta |
M15 - Pegasus |
Orion 8" f/4.9
Gorgous globular. Concentration increases towards the center. Stars resolvable to the core area. Concentrations of stars radiate outwards in arm-like protrusions.
M71 is a very loose glob in Sagitta. It is situated in a very rich star field which exaggerates its lack of compactness. Nevertheless, it is a Class X glob. M71 also has the distinction of having stars with elevated levels of metals, meaning that it may be a lot younger than most of our galaxies globs. It is 12,000 light years away
November 4, 2010 - Eldorado Star Party
Zhumell 10" f/4.9
Sirus Plossl 9mm, 139x
GC Nebula in Sagita. Rich field stars.
M15 is a Class IV glob about 33,000 light years from us. It has the distinction of being the first glob to have its super-massive black hole detected, thus adding evidence to the theory that globs were once a type of Dwarf galaxy.
(not observed as of posting)
Omega Centaurus |
Omega Centari is unlike other globs as it was given its name as if it were a star. This is a result of this glob being bright enough that it appears stellar to the naked eye. It is a Class VIII glob which is 15,600 light years distant. It is our galaxy's brightest glob with a luminosity of 1.1 million suns.
May 12, 2010 - Bar X Ranch
Orion 8" f/4.9
Smart Astronomy EF 16, 62x
Omega Centaurie is an amazing globular cluster. Stars are resolvable to the very core of the cluster. Many dark lanes are also present
Next time out, put a few of these globs , or other ones, on your target list. I assure you that you will not be disappointed.
Clear skies;
rw
Sunday, September 11, 2011
Sketching
Over the years of observing, I have often taken the opportunity to sketch the object that I am observing. One of the things that sketching does is it makes you slow down and spend time to search out the details of the object. Sketching also gives you a visual record that goes beyond your notes, and if you can operate a scanner it allows you to share your eyepiece experience.
Recently, I finally figured out how to operate my scanner on my multi-use printer. So, I scanned in a few sketches that I made at last year's Eldorado Star Party and then did some adjustments with Photoshop. The sketches are done with graphite pencils on a white sketching paper. The scanned images were cropped, adjusted for brightness and contrast and then inverted so it would turn it into a white on black background. I also touched up the individual stars a bit to make them look a bit more round.
So below are a few examples of some of my sketches I did at last year's Eldorado Star party.
NGC 1035, 1042 and 1052 are a trio of galaxies in Cetus. This is a nice tight grouping that fits into the field of view of my 16mm eyepiece (46 arc min). NGC 1042 is face on spiral and very soft visually. 1052 is an edge on spiral with the hint of a visible core. 1035 is another edge on galaxy but with even brightness along its length.
NGC908 is a SABc spiral galaxy in Cetus. The spiral is at an intermediate angle. The core is visible and is approximately 3 arc min long. NGC 253 is known as the Sculptor Galaxy. It is relatively bright at 7.9 mag. This is another spiral SABc galaxy which is viewed nearly edge on. The core is very visible and well defined. Charles Messier missed this object and its discovery in 1783 is credited to Caroline Herschel, sister of famous deep sky observer William Herschel.
So the ability to digitize my sketches and share them has increased my interest in this aspect of the hobby. Going forward my plan will be to do more sketches. More to come....
Clear skies;
rw
Sunday, September 4, 2011
Degree Circles - the poor man's goto
Those that know me realize that I am quite judicious with how I spend my money. My family might even call me "cheap." Nevertheless I am always on the lookout on ways to enhance my hobby and especially when it comes with an attractive price, (read "cheap" here). So you know that I own a large dob. One of the disadvantages with Dob's is that it is rather difficult, and expensive, to equip them with one of those computer pointing devices we call "goto's." Goto's have revolutionized our hobby by allowing relatively inexperienced celestial navigators find the treasures in the heavens. Now I grew up in this hobby by star hopping my way to my targets and I would never recommend anything different for the novice as it forces the newbie to learn the sky. That being said, there is a place for goto's in the hobby. Goto's allow one to increase the speed at which objects are obtained allowing more time spent observing the object and coaxing out the subtle details which is only possible when one spends time observing it.
Now as I said, goto's for large dob's are expensive and you all know my penchant for conserving those green backs. Fortunately, there is an alternative for those, ahem, "cheapskates" like me. Enter the degree circles. Degree circles are a set of graduated circles that are positioned on the azimuth and altitude axis of the telescope. Together with some software, running on either on a laptop or an iPhone, they can allow the observer to point the scope at a set of coordinates for a specific object. The power for pointing the scope still comes from the observer and there is no tracking capability, but it does allow faster acquisition of the target and thus allows for more time at the eyepiece. All this for less than 50 bucks!
A few months ago I decided that I was going to perform this scope modification. The first thing I did was to read up on some experience of others who went before me. Why learn from your own mistakes when you can learn from those around you eh? A great place for this type of information is the Cloudy Nights forum. Here is a huge thread that has a lot of information on installing these degreecircles.
In this thread, I found several PDF files for various diameter azimuth circles. My 10 inch dob has a 22 inch diameter base board, so I needed a 22 inch diameter circle. I found a PDF file for the appropriate size, and took the file on a flash drive to my local Office Max to get it printed out and laminated. The printing was "cheap" at about 4 dollars. The laminating was even cheaper, free in fact, because I had to show the clerk how to reload the stock and set up the machine.
Once home, I cut out the circle and placed it on my base board, making sure any excess was trimmed off. I then needed to cut out the inside of the circle. I fixed the circle onto the baseboard with some all purpose duct tape.
You can see the azimuth circle attached to the base of the scope in the picture to the left. The white circle in the center is the "Lazy Susan" azimuth roller bearings.
Now for the tricky part. I say tricky because when ever I take a jig saw to a precision instrument like a telescope, I get a bit nervous. Because the base that the scope is attached to is of the same diameter as the bottom board, you must remove a portion of the base so you can see the degree circle. So, I used a jigsaw to cut out a 3" by 1" notch. This allows me to see about 15 degrees of the degree circle. I placed this cutout at the front of the scope, directly below the handle. This allows me to see the bearing while still seated at the eyepiece. I painted the newly exposed surface so the particle board would not suffer an ill affects due to moisture.
So, I am almost complete on the azimuth circle. All I need now is an adjustable pointer. Why adjustable? Well, it needs to be adjustable so that you can get it aligned properly. I will talk more about this in a minute. I affixed a magnet to the base board with some double sided tape. I then fashioned a pointer from some scrap wire. I now have a movable pointer on the azimuth axis. Now I also took the opportunity to affix a bubble level to the base board using the double sided tape. This level comes in handy when setting up the scope at an observation site as the scope needs to be perfectly level to maximize the pointing accuracy.
Now onto the altitude degree circle. I could have done something similar and printed out a degree circle for the altitude bearing but there is a simpler method. I went to my local hardware store, Lowe's, and found what they call an "Altitude Meter." This is degree circle with a weighted needle. It gives the angle from the vertical. Now astronomical altitude measurements are given as the angle from the horizontal, but using my grade school geometry, I can simply subtract the altitude bearing from 90 to get what the indicator on the altitude meter should read when I am on the object. The best things about the altitude meter is that it has a magnet which allows it to be placed and removed from the optical tube easily and was only about 20 bucks.
So now it is complete. When I take it out to my observing site, I first use the compass app on my iPhone to get a rough alignment of the bottom baseboard to North, or 0 degrees. I then make sure it is level using the bubble level. If it is off, I shim up the feet until it is level. I then point the scope to a bright star whose alt/az position I know from a real time running software like Stellarium or my beloved SkyTools3. If the scope is level, then the altitude should be dead on. I just need to move my adjustable pointer to the azimuth that the software is calling out for that particular star. And that is it. I can read the alt/az for any object from the Stellarium or SkyTools3 and push my scope to those bearings and presto, there's the object in the wide field lens. Its like shooting fish in a barrel! It is almost like cheat'n.
Clear skies;
rw
Sunday, August 21, 2011
Old Friends
I finally got around to cleaning out my office this week. This is a semi annual ritual where I attempt to clean out the accumulation of the previous six months of clutter. My office has a tendency to collect articles that my family can't otherwise determine a better home for. Never-the-less, it is a task that I often look forward to as the thought of having a clean space to work in once again is in itself a welcomed reward. One of the tasks involved this time was to go through my overloaded bookshelf and purge some of my collection to make room for my more recent acquisitions that are lying around the house. So while going through the bookshelf, I started to reminisce a bit about some of the volumes on the shelf and how they influenced my passion for astronomy.
One of the very earliest astronomy books that I had was A FIELD GUIDE TO THE STARS AND PLANETS (1964), by Donald H. Menzel. I received this, now well worn, field guide from my parents one Christmas. I was probably twelve or thirteen at the time and was observing with a Tasco 60mm refractor. This book was to become my primary source of study and reference. The book contained a sky map for each month along with a complete set of atlas style charts and accompanied by a photographic plate. Under the chart was a description of some of the most significant deep sky objects. There were lunar and martian maps, discussion of how telescopes worked and several tables of astronomical data. It was truly an amazing reference for a young observer. I remember toting it with me on family vacations to cottage country in Central Ontario and on trips to Florida with my grandparents. Although many of the objects in the charts were beyond the capabilities of my 60mm refractor, the book whetted my appetite for the hobby.
Fast forward about 25 years and I am now thirty-something and living on the Texas Gulf Coast. I did not become the professional astronomer that I thought I would become. No, I was far more practical and became an engineer, however, I did not lose my enthusiasm for the night sky. In 1997, I purchased a 4.5 inch reflector. The views through it were incredible compared to those I remember of the little 60mm. So with this new scope, I also upgraded my library and purchased Terrance Dickinson's beautifully illustrated NIGHTWATCH, A PRACTICAL GUIDE TO VIEWING THE UNIVERSE. Now the meat of this book was its star maps. In some ways they were simpler than those of the previous guide. The charts only covered what the author thought were the most interesting parts of the sky and only listed the objects that were easily seen from a suburban location with a modest scope or binoculars. So, like its title, it was very practical for those like myself. The new scope and this book opened up a whole new universe for me.
Well, it did not take someone with a new scope long to go through the list of objects in Terrance's book. I was fortunate to come across another influential guide and this time it was Robert Garfinkle's, STAR-HOPPING - YOUR VISTA TO VIEWING THE UNIVERSE. In this book, Robert teaches the reader the art of star hopping to locate some of the sky's elusive treasures. There is a chapter for each month which takes the reader through a star hopping journey which stops at multiple and variable stars, nebula, clusters and galaxies. Robert interweaves into the journey visual descriptions, historical and scientifically significant data. It is a fascinating read whether you are at the scope following his simple directions, or in the easy chair on a cloudy night. It has been a few years since I have actually used this book now, but as I leaf through its chapters I get the urge to take one of the author's star hopping journey's again.
Well, these three volumes will always have a place on my over-crowded bookshelf. Even if they do not contribute to my current observational work, there is simply too many memories to part with these gems. They're like old friends that you like to spend time with on occasion and perhaps one day they will be passed on to an interested youngster to inspire them as they have me.
clear skies;
rw
Saturday, July 30, 2011
Going over to the Dark Side, or maybe not...
You can tell by reading my blog that I am an avid visual observer. I have resisted the urge to enter into the "dark world" of imaging. I am not really sure why I have resisted, perhaps the initial cost of the equipment, or perhaps the time spent observing would be spent with a lot fewer objects. For what ever the reason, I have not entered the imaging world many of my peers, well, until now, sort of....
In recent years, several for-hire robotic telescopes have been popping up on the Web. These are scopes with sophisticated automation, usually residing in a dark site, that amateurs like myself can utilize for imaging. Some of these sites are supported by membership fees, or time rental. Well, I was not really interested in spending part of my hobby budget on something that was not as tangible as a new eyepiece or software. However, I found a site that was a free service. The University of Bradford has a robotic scope in the Canary Islands which they have set up as a public outreach program. Anyone can submit a job request to image an object. The user has the ability to select exposure times, dark frames, and different filters. The jobs go into a que and are run on some type of priority basis. I have had jobs completed in as little as 48 hours.
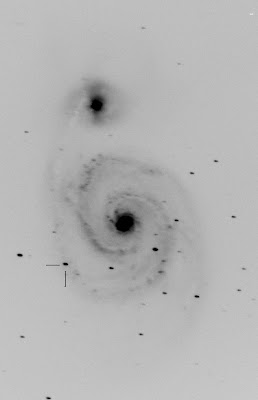
I recently submitted a couple of requests . This first one is of M51 that was taken on July 24th. This is one of the Arp Galaxies which is interacting with a neighbor. You can clearly see the spiral arm that wraps from the larger to the smaller galaxy. In the arm at the place indicated by the cross is a super nova. This is SN2011dh discovered earlier this year.
This was a 2 minute exposure done with a dark frame applied and no filters. It was amazingly simple and provided such a nice image. It is surprising to see how much detail is present in the spiral arms. Adjusting the contrast of the image will bring out different aspects of the galaxy.
The image below is NGC 4631, or the Whale Galaxy. This was another 2 minute exposure taken on July 24th. Above the galaxy you can see the companion, NGC 4627. Again, there is surprising detail in the structure of the galaxy. There are nodules along the galactic plain indicating possible concentrations of stars or star forming regions.
So, am I about to go out and purchase a bunch of imaging equipment? Probably not. I see this as more of a cloudy night activity where I can check out interesting subjects, or perhaps perform my own supernova search. For those of you who are more the armchair observer, then this site was tailor-made for you. Log on and give it a try, or just look at some of their images in their gallery.
Clear skies;
rw
Sunday, July 24, 2011
Arp's Universe - A New Perspective
Last November, I spent a few days at the Eldorado Star Party in West Texas. While there I had the pleasure to meet Dennis Webb. Dennis had recently co-authored a book chronicling Halton Arp and his peculiar galaxies. I recently received this book as a gift and I have been thoroughly enjoying it. It is a fascinating read into the life and work of Halton Arp. Now for those that do not know Arp, he is an American professional astronomer who worked with Hubble in the 50 and 60's.
Arp's started out by gathering photographs of "strange" galaxies. These were galaxies that just did not seem to fit our idea of a well organized, symmetrical design. He eventually published an atlas of 338 of these peculiar galaxies. While a beautiful collection in itself, this alone was not Arp's claim to fame.
You see, Arp made a discovery that showed quasars had a nasty habit of showing up in close proximity to these peculiar galaxies and further more in some cases, like NGC 7603, there seemed to be a structural relationship between the galaxy and the quasar. The problem here is that the galaxy and the quasar are are vastly different distances from us. The quasar here, Object 1, is twice as far away as the galaxy, so, how can they be connected? The distances here are measured by "red shift." This is the phenomenon that causes spectral lines to shift wave length in proportion to the velocity at which the object is receding from us. This is the same phenomenon that makes a train whistle change pitch as it passes by. The higher the red shift, z, then the faster the object is moving away from us, and in an expanding universe, the further away the object is. So, what Arp was now suggesting, is that red shift has an intrinsic component that changes over time and thus red shift alone cannot determine distance. And here is where Arp really puts the screws to modern cosmology. If red shift cannot be used to measure distance, then there is no proof that the universe is indeed accelerating and thus no Big Bang!
Opponents of Arp's suggest that the quasar and NGC7603 is just a chance alignment. However, after closer examination, 2 more quasars were found, Object 2, and 3, both of which lie along the same galactic structure connecting the galaxy to the first quasar! So if this was now a chance alignment of 4 objects then the statistical probability of that happening are "astronomically" small and Arp would argue virtually impossible.
Halton Arp has paid a professional price for his work. Because the work flew in the face of popular theory, Arp was branded an astronomical heretic by many of his peers. Tolerance for his alternate theories was non existent here in the US. Arp lost his telescope time at Palomar and became an outcast of popular astronomy. Eventually, Arp resigned from the Carnegie foundation and relocated to Europe where his alternate theories were tolerated more and he was given more freedom to pursue his research.
Well, I did not intend to give a lesson on cosmology here because I am woefully under qualified for that. What I did intend to do is to point out that our understanding of our universe may not be as complete as we had thought. Astronomers, like Arp, are utilizing observational data to refute the current theory of an expanding universe. This is not unlike what Copernicus and Galileo did many centuries ago. Arp may eventually be proven correct and his name may one day be held in the same regard as Copernicus and Galileo. Only time will tell.
Clear skies
rw
Wednesday, June 8, 2011
Texas Star Party '11 - Part 2
While this year's Texas Star Party could have had better weather for observing, it still had a lot of "surprises." Some of these surprises were seen through the eyepiece, while some just sneaked up from behind a parked car. I spotted this tom on my way out of the ranch on Friday morning.
Below are a few of the other surprises that I saw through the eyepiece last week. These were some of the best objects of the week.
The first one is The Splinter Galaxy, or NGC 5907. This is a 11th magnitude, edge on spiral galaxy in Draco. At 78x, the galaxy shows no real sign of a core, just a subtle brightening towards the center. I guess the attraction here is because of the thinness of the edge on galaxy. It really lives up to its name as the "Splinter" galaxy. Had I had more observing time or better seeing, I would have liked to come back to this object to see if any of the dark lanes were visible.
The next object is M27, the Dumbbell Nebula. This is a very nice planetary nebula in Vulpecula. It is a 7.3 magnitude PN which displays quite well in the dark skies of West Texas. At 42x, it appears as a hazy patch, somewhat squarish in shape. At 100x, you see two brighter sides joined by a bright central bar. I suspect this is what gives it it's "Dumbbell" name. This is one of the finer objects of the week.
The last showpiece object was NGC 6826, otherwise known as the "Blinking Planetary." At 100x, this PN is bluish green in color. Direct vision makes the PN appear as a fuzzy star. When viewed with indirect or averted vision the PN suddenly swells in size, resulting in the so called "blinking." It was a truly amazing thing to observe as I switched from direct to averted vision and then back. The PN seemed to pop out and back in size. Moving the power up to 139x makes the blinking effect go away and the PN remains steadily swollen. Pretty cool!
Well, that's it for TSP'11. Two and a half nights of so-so observing, 34 objects logged, some new friends made, and a farewell wish from a turkey. Not a bad way to spend a week of vacation.
Clear skies;
rw
Sunday, June 5, 2011
Texas Star Party '11 - Part 1
Last Sunday, I made what has started to become my annual pilgrimage to the West Texas Davis Mountains to attend the Texas Star Party. This is one of, if not the largest, star party in North America. The Davis Mountains offer extremely dark skies at an altitude of about 5,000 ft. A combination that draws amateur astronomers from all over the country, and some from across the globe. I personally met people from Wisconsin, California, Washington DC, South Carolina as well as Ontario, Canada. The fellowship, and presentations from other amateurs was truly amazing and makes up a very large part of the whole experience.
The other part of the experience is of course the opportunity to observe under some of the darkest skies in the United States. Unfortunately this year, Mother Nature did not smile on the star gazers as well as in past years. Sunday and Monday nights were fair. Tuesday evening presented itself with a wind storm with 50+mph wind gusts. Wednesday evening had extremely poor seeing until the clouds showed up. Thursday teased us all day with perfectly blue skies only to end with clouds and smoke from a grass fire to the West. With Friday not looking much better, I decided to pack up and start the 10 hour drive home.
Well, I do not want to dwell on the "what could have been," and instead, I would like to describe some of the true showpiece objects that I had the privilege to observe. All of the following observations were performed on my Zhumell 10 in Dob on May 30th between 10pm and 1am.
NGC 4826 - Black Eye Galaxy - Sirus Plossl 9mm, 139x Elongated with some brightening towards center. No defined core. Mottled appearance. Some dark lanes visible. Looks very much like a globular cluster.
M 81 - Bode's Galaxy - Smart Astronomy 12.5, 100x Slight brightening towards center, mottled appearance on the arms. Core is non-stellar, halo visible.
M 82 - Cigar Galaxy - Smart Astronomy EF 16, 78x Edge on galaxy, slight brightening towards center, distinct core not visible.
M101 - Smart Astronomy 12.5, 100x Face on galaxy, core non-stellar. Individual stars visible in arms. Dark lanes between the arms. Arms appear to wrap clockwise from center.
M104 - Smart Astronomy 12.5, 100x Elongated, central bulge visible with stellar core. Averted vision reveals some mottling or dark lane down major axis of the galaxy. Sirius Plossl 9mm, 139x more mottling visible, core becomes non stellar, dark lane more visible.
M63 - Sirius Plossl 9mm, 139x Elongated in E-W direction, bright star on western edge. Central portion brighter, core is non stellar, some hint of arms.
M20 - Smart Astronomy EF 16, 78x Star cluster with associate nebula. Nebula is to the east of the cluster.Nebula has central dark lane. Cluster is also dissected by dark line. Several faint stars shine though the nebula. Majority of the cluster stars are on the east side. Stars in cluster have similar brightness.
Cluster is detectable with the naked eye.
SN2011BY - Smart Astronomy 12.5, 100x Supper Nova is very faint. Host galaxy NGC 3972 is only visible with averted vision. It is an edge on mag 13 object.
More next week.....
Clear skies
rw
Saturday, April 9, 2011
Targets of Opportunity
I spent last weekend at the Hodges Garden Star Party in Louisiana. This is an annual event sponsored by the Baton Rouge Astronomical Society. This was my first time attending the event, but by no means will it be my last.
I arrived Thursday, and got set up. The observation field was a large pasture. There were about a dozen or so tents already set up.
Thursday night proved to be some truly awful seeing. I had brought a target list which had a lot of southern objects, but the southern sky seemed to be the worst for this location with a bit of a light dome. So, I turned to the list of H400 objects in Leo. In spite of the seeing, I was able to observe 14 galaxies in Leo and a total of 19 objects before turning in at about 1:30.
Friday evening proved to be another challenge, this time it was scattered cloud. I was able to finish off the H400 objects in Canis Major and I took the opportunity to gaze into the Virgo Galaxy Cluster. This was the first time my 10" scope had explored this region of the sky. I was not disappointed. The light grasp of this light bucket is truly amazing. I worked on the Eastern side of the cluster, recording M58, 59, 60, 89, and NGC 4564, 4567, 4568, 4596, 4608, and 4638. The clouds made their reappearance shortly after midnight and I called it a night with 15 objects scratched off my list.
Well Saturday night proved to be amazing conditions. The star party was opened to the public until about 10PM, and so the serious observing did not start until after the public had left. This time I attacked the Virgo Cluster from its dead center. M84 and M86 are located midway on a line between Denebola (Beta Leo) and
Vindemiatrix (epsilon Virgo).
As I looked through the 30mm wide field eyepiece, I saw six, yes six galaxies in the same field of view. M84 and M86 were the most prevalent, but in the also in the view was NGC4435, 4438, 4388 and 4461!
Here is the DSS photograph of M84, M86 and NGC 4438. The trio form an equilateral triangle with M84 on the right, M86 on the left and NGC 4388 at the bottom. Cores and halos are visible on the Messier objects. M86 seems wider than M84 and suggests that its axis is tilted more towards us than M84's.
NGC 4388 was much fainter with even brightness across its length, no core was visible.
Located to the east of the trio are a pair of galaxies, NGC 4435 and 4438. This pair is known as "The Eyes" and do look like a pair of eyes staring out of the darkness at you. Cores and halos are both visible.
The night ended with another 22 objects recorded. My H400 count now stands at 93. The performance of the 10" Zhumell was amazing and I am looking forward to the dark skies of Fort Davis at the Texas star Party next month.
Clear skies;
rw
Sunday, March 20, 2011
Star Party Preparation
The Hodges Garden Star Party is the week after next and I thought it would be appropriate to discuss just how I prepare for a star party. I have found over the years that in order to maximize your experience at a star party, you need to be very well prepared. Preparation not only takes the form of the equipment that you will take, but also what you want to observe while at the party.
Hodges Garden is a little unique as this will be the first time I that I have attended this event. So I started my preparation by a careful review of the website. This particular star party is hosted by the Baton Rouge Astronomical Society. It is held at Hodges Garden State Park in west central Louisiana. The party is held from March 30th through April 3rd. There are limited facilities and as stated on the website, "camping is at its most basic."
A quick look at Clear Sky Clock for a nearby site shows that the site has reasonably dark skies with a Bortle rating of 3. The clear sky clock also shows that humidity is a potential issue after midnight on most nights. This is important, as the observing site does not have electricity on the observing field. This means no hair driers to fight the dew. Luckily for dob owners, dew is not much of a problem except for the finder scopes and eyepieces.
The absence of electricity is important as I normally rely on my lap top for star charts and observing lists. So, it looks like I will need to plan on printing out my observation lists and bringing my Sky Atlas 2000. I will also bring both volumes of The Night Sky Observer's Guide. This is a really good reference for those faint fuzzies that I am hoping to see.
So, that brings us to figuring out what to observe. I am always torn between quantity and quality of the observations. Do I try and log as many objects as I can, or do I stop and spend quality time with each object, perhaps even sketching them. I do not have a great answer for this, and this is probably why I still struggle. I will say, that the answer depends on the weather forecast. If the weather looks good and I will get multiple nights to observe,then I am more likely to take my time with each object. If the forecast shows that there will be a limited window for observing, then I will typically go for quantity.
There was not a mention of an observation list on the website, so I guess I need to develop my own. As I have been working on the H400 list, it makes sense to see what damage I can do on that list. Utilizing my charting software, Cartes du Ciel, I look to see what is going to be visible from 8PM to 1AM. I utilize a 5 hour window as I usually fade pretty fast after midnight unless the viewing is truly spectacular.
The other criteria that I use when deciding what to view is the altitude of the object. I want to observe objects when they are at least 30 degrees above the horizon as this reduces the air mass that I am looking through. Now some of the southern objects will not meet this criteria, but I will just plan on observing them when ever they reach the zenith.
So as I look at the possibilities there are two groups that become evident. The first group is the H400 objects in Mon, Pup, CMa, and Gem. There are 33 objects still on my list. These objects are primarily open clusters embedded within the Milky Way. I think that this list will be achievable if I get 2 good nights to observe.
The second group consists of mostly galaxies in constellations that will be rising through the evening, Leo, UMa, Hya, Sex, Crv, Crt, Vir. There are a lot, 112 to be exact, of objects that are still on my list in these constellations. I think observing some of these should be on the list as they should really shine at this dark site. Now, I can't get everything, so I need to pare the list down to just a couple of constellations. Hya, Crv and Crt just have 1 object a piece left on the list, so I should go and get these out of the way. Leo has 18 left on the list and it will be pretty high in the sky most of the night and so I will include it.
So, now I have my completed list. 54 objects in total. If I get 4 nights of good weather, then it should be doable. If I get less than four nights, then my strategy will be from the top down as there will be other nights in April and May that I could use to get the objects at the bottom of the list.
NGC RA RA Dec Dec Tp Con Mag.
2204 6 13.5 -18 35 OC CMa 9.1
2215 6 18.4 -7 16 OC Mon 8.6
2232 6 24.1 -4 43 OC Mon 4
2244 6 29.7 4 54 OC Mon 6.2
2251 6 32 3 24 OC Mon 8.5
2264 6 38.4 9 56 EN Mon 4.7
2286 6 45.1 -3 7 OC Mon 8
2301 6 49.2 0 31 OC Mon 5.8
2304 6 52.3 18 5 OC Gem 10.1
2311 6 52.8 -4 31 OC Mon 9.6
2324 7 0.4 1 8 OC Mon 8.8
2335 7 4.2 -10 0 OC Mon 9.1
2343 7 5.9 -10 34 OC Mon 8
2353 7 12.3 -10 12 OC Mon 5.3
2354 7 12.2 -25 38 OC CMa 9
2355 7 14.2 13 52 OC Gem 9.5
2362 7 16.6 -24 52 OC CMa 10.5
2371 7 22.4 29 35 PN Gem 11
2372 7 22.4 29 35 PN Gem 11
2395 7 24.3 13 41 OC Gem 9.4
2420 7 35.4 21 41 OC Gem 10.2
2421 7 36.3 -20 37 OC Pup 9
2423 7 34.8 -13 45 OC Pup 6.9
2440 7 39.9 -18 5 PN Pup 11.5
2479 7 54.7 -17 35 OC Pup 9.5
2482 7 52.8 -24 10 OC Pup 8.7
2489 7 56.2 -29 56 OC Pup 9.4
2506 7 57.7 -10 29 OC Mon 8.5
2509 7 58.5 -18 56 OC Pup 9.3
2527 8 3.2 -28 1 OC Pup 8
2539 8 8.4 -12 41 OC Pup 8.2
2567 8 16.6 -30 29 OC Pup 8.3
2571 8 16.9 -29 35 OC Pup 7.5
2964 9 40 32 5 GX Leo 11
3190 10 15.4 22 5 GX Leo 11.3
3193 10 15.7 22 9 GX Leo 11.5
3226 10 20.7 20 9 GX Leo 11.5
3227 10 20.7 20 7 GX Leo 11.4
3395 10 47.1 33 15 GX Leo 12
3489 10 57.7 14 10 GX Leo 11.5
3521 11 3.2 0 14 GX Leo 10.5
3593 11 12 13 6 GX Leo 11.3
3607 11 14.3 18 20 GX Leo 9.6
3608 11 14.4 18 26 GX Leo 11.1
3626 11 17.5 18 38 GX Leo 10.5
3640 11 18.5 3 31 GX Leo 10.7
3686 11 25.1 17 30 GX Leo 11.4
3810 11 38.4 11 45 GX Leo 10.8
3898 11 46.7 56 22 GX Leo 11.5
3900 11 46.6 27 17 GX Leo 11.5
3912 11 47.5 26 46 GX Leo 11.5
3962 11 52.2 -13 42 GX Crt 11.3
4027 11 57 -18 59 GX Crv 11.5
5694 14 36.7 -26 19 GC Hya 11
In a future blog I will tell you how successful I was, until then,
Clear skies;
rw
Subscribe to:
Posts (Atom)